|

This tutorial is by Angela das Graças, whom I
thank for letting me translate her tutorials.
*
Original here

*

*
Material

*
Plugins
Two Moon:
Wish it Would Rain Plug-in
Two Moon
Quilt
Dreamulator
Vertical Riplie
VenitianBuilder
You can find these plugins on the websites of:
Renée
Cloclo
SCRIPT
Open the mask in psp and minimize
Open a new transparent image with 1000x600px
Choose two colors from your tubes: a dark one for the foreground and
a light one for the background
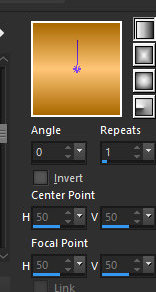
Prepare a Linear gradient
Paint the image with this gradient
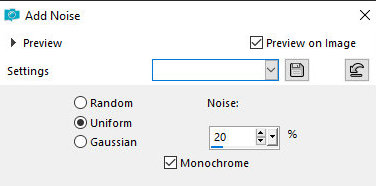
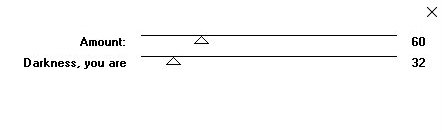
Adjust / Add/Remove Noise / Add Noise
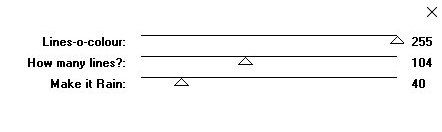
Effects / Plugins / Two Moon / Wish it Would Rain
Effects / Plugins / Two Moon / Quilt

Effects / Plugins / Two Moon / Dreamulator
N.A.: You can colorize this effect according to your colors
Add new layer
Paint with the light color
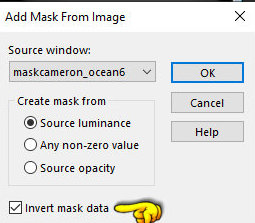
Layers / New Mask Layer / From Image / Mask [maskcameron_ocean6] -
INVERT MARKED
Merge Group
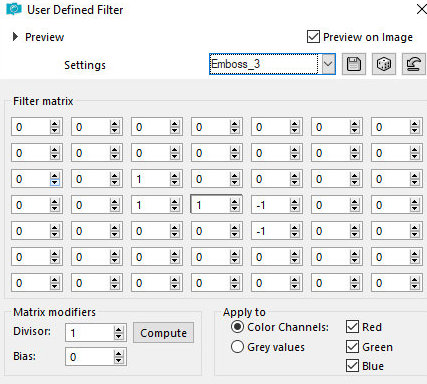
Effects / User Defined Filter / Emboss 3
Layers / Properties / blend Mode: Luminance (L)
Activate the Raster 1 layer
Copy the misted landscape tube [ns-paisagem1141] and paste it as a
new layer
Layers / Properties / opacity=80%
Activate the Top Layer
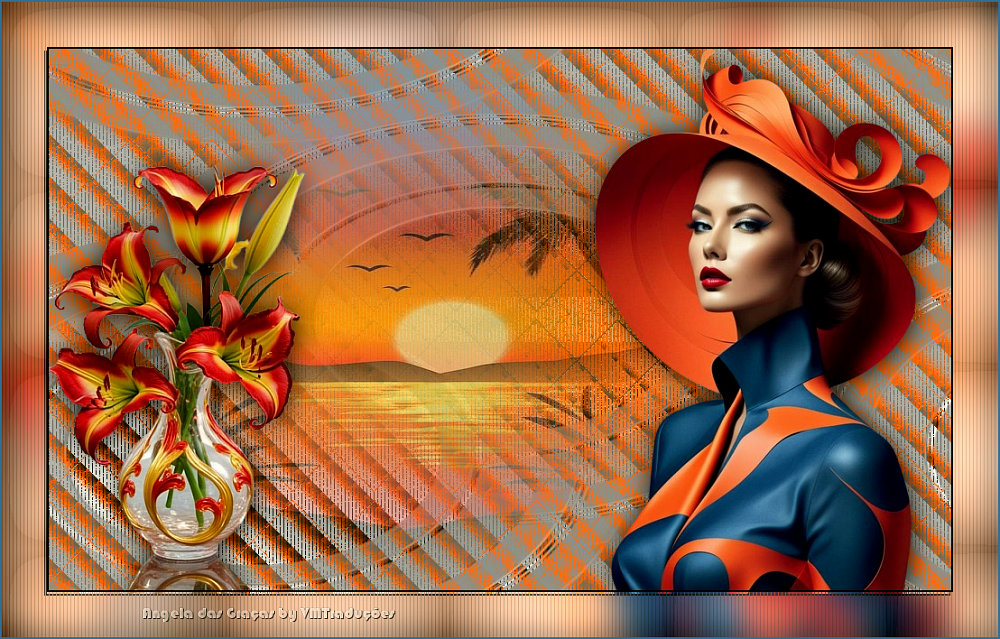
Copy the character tube [angelagmn57] and paste it as a new layer
Position according to the model
Drop Shadow of your choice
Copy the floral tube [floral_angelagmn17] and paste it as a new
layer
Position according to the model
Drop shadow of your choice
Image / Add borders / 2px / dark color
Copy (it will stay in memory)
Selections / Select all
Image / Add borders / 50px / a different color
Selections / Invert
Paste the image that is in memory into the selection
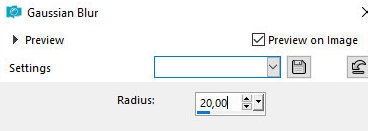
Adjust / Blur /Gaussian Blur=20
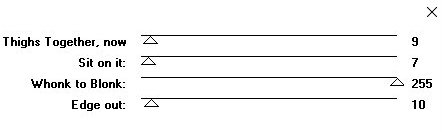
Effects / Plugins / Two Moon / Vertical Ripple
Effects / Plugins / Two Moon / VenitianBuilder
Select none
Image / Add borders / 2px / dark color
Image / Resize: width=1000px
Place signatures
Merge All
Save as jpeg
* Tutorial traduzido em 25/06/24
*
 |